The process described in this documentation reflects the way the team at Five Simple Steps worked, so it's best suited to people working on Macs, and references tools they used.
Bear in mind that you'll need access to a variety of devices (at least an iPad and Kindle) to test and view your ebook.
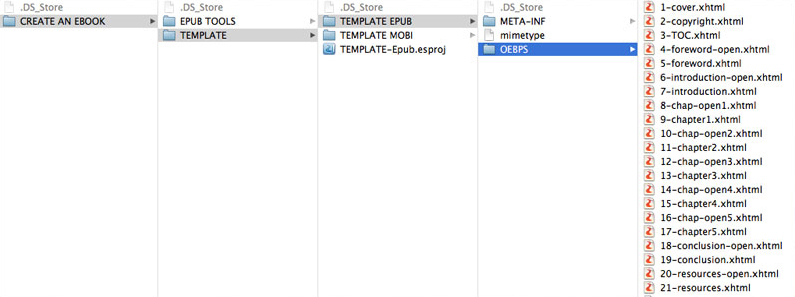
You’ll find all the project files you need to get started within the .ZIP file. All the information that you need to change in the template files appears in uppercase.
Before you get started
There are a few things that you’ll need before you get stuck into creating an ebook.
Manuscript
You will need an edited and finalised manuscript, complete with all reference URLs. Having a finalised manuscript ensures you have fewer errors throughout the process.
Images
All images (including the cover) will need to be created and optimised for the web. Images should be no wider than 800px and need be saved for web as .jpg files. It’s important to reduce the file size of the images as much as possible while retaining quality.
A good naming convention to follow for images is to set them in chapter and numerical order, as shown below.
img-chapter number-image number.jpg →img-1-1.jpg
Once all your images are ready, move the image files into the OEBPS project folder.
Espresso
This guide explains the process of working in Espresso and refers to it throughout, but you can use any text editor.
ePub Zip 1.0.3
To create the final .epub file, ePub Zip is a handy script that will save you time.
Calibre
You can use Calibre to convert your ePub file to a mobi version for Kindles and other devices.
Devices
It’s essential you view and test your ebook on a range of devices. Ideally an iPad, a Kindle and an Android tablet are best to test on to ensure compatability for the ePub and mobi formats.
Got all of those? Then let’s get started
- Double click the TEMPLATE-Epub.esproj file in the main TEMPLATE folder to open the project in Espresso.
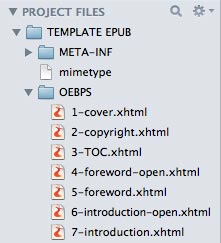
- Expand the TEMPLATE EPUB folder and then expand the OEBPS folder.
Key book information
-
Change the book title on each page
Work through each file within the project in order, and change the title of the book to one of your choice.
-
Enter details in copyright.xhtml
Edit all information as needed and ensure all referential links are added to the
href. -
Enter metadata details at top of content.opf
Edit all information as needed. Don’t forget to change the
opf:file-as="SURNAME, FIRST NAME". -
Add ISBN to toc.ncx
Add the ISBN number within the
<head>area of the toc.ncx file -content="urn:isbn:ISBN NUMBER (no hyphens)"/>.
For more information on ISBN numbers, take a look at Nielsen Book.
Book structure
-
Add or delete pages in the project (if needed)
Within the project files in the left hand side of Espresso, add or delete files to add or remove pages from the book. Be sure to re-number the files as you go.
-
Reflect changes in...
You will need to reflect the file structure changes within the following files:
toc.xhtml
Each of the chapter link locations must match the project file names.
content.opf
All
manifest itemlink locations must match the project file names, and theidnumber will need to be updated in numerical order. You will also need to update thespineitemrefto match the number ofmanifest items.toc.ncx
Each
navPointwill need theid,playOrderandsrcamending to match the project file names and numerical order.
Initial content
-
Add chapter titles to chapter-open#.xhtml pages
Within each chapter-open file, add the relevant chapter titles.
-
Add chapter titles to toc.xhtml and toc.ncx files
You will need to reflect the chapter title changes within the following files:
toc.xhtml
Each of the chapter titles will need to be changed.
toc.ncx
Each
textitem within eachnavPointwill need the chapter title changed.
-
Add images to item list in content.opf
Add an
itemwithin the content.opf file for each image, following the example provided with theidofimage#. Theidof theitemswill need to be renamed in numerical order.<item id="image1" href="img-1-1.jpg" media-type="image/jpeg"></item>
Page content
-
Add page content
Copy and paste content from the manuscript and wrap in the appropriate HTML tags. Ensure the code structure (as provided in the template) is followed.
Link up images
All images within the content need to be linked to the correct project image files within the OEBPS folder.
Actions
-
Convert all page content to named entities
Certain characters will need to be converted to named entities in order to display correctly and be semantically valid. In Espresso, select all of the page content, go to Actions in the menu, then HTML, and select Convert to named entities.
A reference of named entities can be found here
-
Check content for anomalies
Check for any remaining double spaces, tabs, straight single and double quotation marks, hyphens, ampersands, any code examples with
<or>, and convert as needed.
Compress, validate and finalise the ePub
- In Finder, drag the BOOKNAME EPUB folder onto EPUB Zip 1.0.3. This will compress the EPUB folder into an .epub file in the main TEMPLATE folder.
- Open your browser and go to http://validator.idpf.org.
- Choose the BOOKNAME EPUB.epub file that you have just created and click Validate.
- Fix any errors that are listed and repeat the steps above. If you don’t have any errors, move to the next step.
- Connect your iPad to your Mac and open up iTunes. Click iPad > On this iPad > Books. Now drag the BOOKNAME EPUB.epub file into iTunes.
- Check for any content and visual inconsistencies and errors on the iPad. Also make a note of the page count.
- Make any changes within the project files in Espresso, and be sure to add the page count in the
metadataof content.opf. - Repeat the steps above until you have an error-free and valid ePub.
Create the mobi version
- Duplicate the META-INF, mimetype and OEBPS files in the BOOKNAME MOBI folder.
- Replace the styles.css file in the OEBPS folder with the styles.css file from the EPUB TOOLS folder.
- In Finder, drag the BOOKNAME MOBI folder onto EPUB Zip 1.0.3 in the EPUB TOOLS folder.
- Open Calibre and drag the BOOKNAME MOBI.epub file into the main window.
- Select that file and click Convert books.
- Select MOBI from the Output Format dropdown menu.
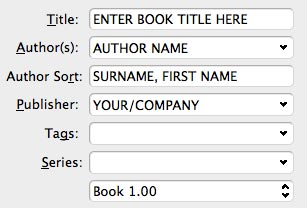
- Check that the details in the book information fields are correct.
- If the information is correct, click OK.
- When the mobi version has been created, you will see MOBI appear in the Format area on the right hand side of Calibre (under the book cover image).
- Follow the Click to open link next to Path.
- Drag the BOOKNAME MOBI.mobi file into your main book folder.
- Delete the BOOKNAME MOBI.epub file you created earlier.
- Add the BOOKNAME MOBI.mobi to your Kindle or Android tablet.